Sydney’s Stadium Australia hosts a 90-point group-stage decider for the ages…
In every Rugby World Cup, there are specific matches where everybody takes notice. The opening match. The final. The giant-killings. Pretty much any game from the quarter-finals onwards. However, many of the best games from each edition of the Rugby World Cup come from the Pool Stage. This makes sense, considering the Pool stages comprise 40 (83%) out of the 48 games played at each RWC. Sometimes these matches involve the two biggest teams in the group facing off in a titanic clash. Sometimes it is two unfancied minnows putting together a hidden gem that nobody except rugby journalists and hardcore fans actually watches. Other times a second-tier nation takes on one of the big guns, and either beats them or simply scares the team before the knockout rounds. With another Rugby World Cup on the horizon, The Scoreboard will present a few choice cuts from the competition’s history.
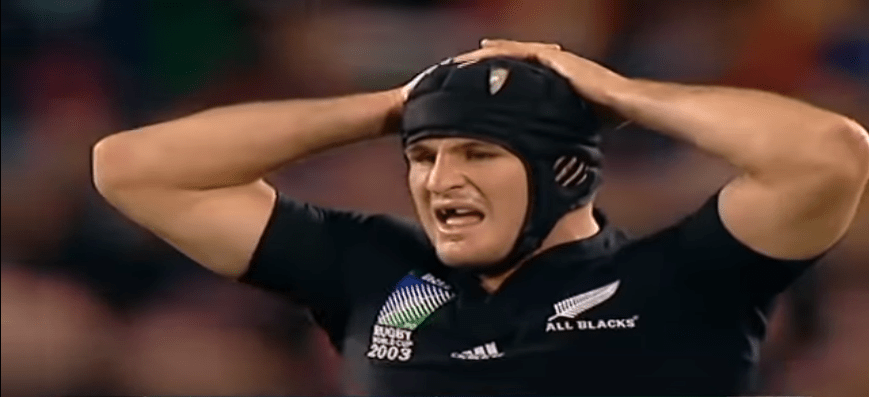
The first match in this series comes from the the 5th Rugby World Cup in 2003. The 2003 RWC was hosted by defending champions Australia, hoping to become the first team to retain the trophy while also being the third host nation to win the tournament. Pool D of this World Cup featured 1987 winners and 1995 finalists New Zealand as the headline act, closely followed by 1987’s bronze medallists Wales (in addition to Italy, Canada and Tonga). New Zealand and Wales would enter this World Cup on opposite ends of the form scale. However, when these two teams faced each other inside Sydney’s Telstra Stadium (now Stadium Australia) on 2nd November to decide the winner of Pool D, they would put on an unforgettable match for the ages.
The build-up
New Zealand and Wales may have entered this final group match as the top two teams in Pool D. However, the two sides entered the World Cup on two completely opposite sets of form. New Zealand travelled to Australia after 6 wins from 7 matches so far in 2003, the only defeat coming at home to England in June. The All Blacks had also recently won the Tri-Nations Series with an unbeaten record, even putting 50 points on both Australia and South Africa in victories during the tournament.
In contrast, Wales had won just 2 out of their 11 games leading up to the World Cup. Steve Hansen’s team had started the year by going winless in the Six Nations, finishing bottom of the standings to claim the Wooden Spoon for the first time since 1995. A two-test summer series Down Under had also produced a pair of convincing defeats. The second of these two tests was a heavy 55-3 loss to New Zealand four months before the two teams met again in Pool D. Even Wales’s final World Cup warm-up started badly as the team were dominated by Ireland (35-12) and England (9-43) on consecutive weekends. It was only with successive victories over Romania (54-8) and Scotland (23-9) that Wales’s form started to trend upward heading into the World Cup.
Despite differing levels of form heading into the competition, New Zealand and Wales would enter their final Pool D match with 100% winning records. Pegged as one of the pre-tournament favourites, New Zealand had looked utterly dominant in their three round-robin matches, scoring 35 tries and 229 points. John Mitchell’s team opened with a 70-7 victory over Italy, a twelve-try mauling where Doug Howlett, Carlos Spencer and Joe Rokocoko scored braces. Six days later, in the same Melbourne stadium (Docklands Stadium) would come a more modest 10-try, 68-6 drubbing of Canada, with Mils Muliaina touching down four times. Finally, the All Blacks had brought up three wins from three with a 91-7 demolition of Tonga in Brisbane. Nine players scored thirteen tries, including two for Howlett, Muliaina and Caleb Ralph. The All Blacks travelled to Sydney on 2nd November full of confidence and the expectation of earning another victory against Wales.
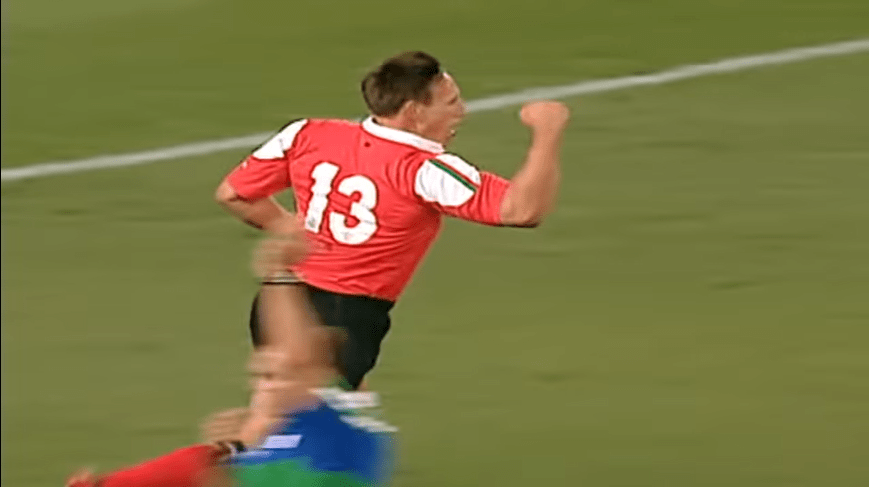
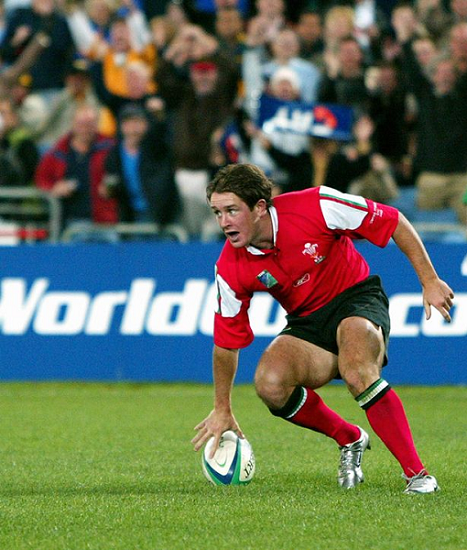
Meanwhile, Wales had gone about their business more quietly and less impressively than New Zealand. Steve Hansen’s team had withstood an early assault to defeat Canada 41-10 in their opening game, with centre and rugby league convert Iestyn Harris catching the eye. However, Wales would follow this up with a sloppy 27-20 win over Tonga, in which the Pacific Islanders outscored them three tries to two. In wet conditions, the Tongans would harry Wales the entire match and only a try and a drop goal from replacement flanker Martyn Williams would seal a nervy victory. Then, the Welsh would work hard to defeat Italy 27-15 and confirm their place in the quarter-finals with one game to spare. The Italians would dominate possession for long periods of the match, but all 15 of their points would come from the boot of kicker Rima Wakarua. At the same time, Wales would be more clinical with their chances and tries from Mark Jones, Sonny Parker, and Duncan Jones would eventually give them their third victory. Wales would head into their final match two points behind New Zealand with a quarter-final place booked and with a chance of still winning Group D. However, based on their performances in the World Cup so far, even the most optimistic Wales fan wouldn’t predict anything other than a comfortable All Blacks victory in Sydney.
The match
Team selection
With both teams already qualified for the knockout stages, it was little surprise to see coaches John Mitchell (New Zealand) and Steve Hansen (Wales) make multiple changes to their starting XVs for this final pool match. Mitchell would make six alterations to his All Blacks team, with the vast majority coming in the forwards. In the pack, prop Dave Hewett and hooker Keven Mealamu would join Greg Somerville in the front row, and Richie McCaw (flanker) and Jerry Collins (No.8) would join captain Reuben Thorne in the back row. In the backs, Aaron Mauger would come in at inside centre, and Joe Rokocoko would return on the left wing. As a result of these changes, prop Kees Meeuws, number 8 Rodney So’oialo, and fly-half Dan Carter would all drop to the replacements bench. Scrum-half Byron Kelleher would replace centre Ben Atiga as a substitute.
The Wales team would feature ten changes from the one that beat Italy eight days earlier, with only hooker Robin McBryde, prop Adam Jones, lock Brent Cockbain, centre Sonny Parker and captain Colin Charvis keeping their places. Iestyn Thomas would join McBryde and Jones in the front row, Robert Sidoli would partner Cockbain in the second row, and Jonathan Thomas and Alix Popham would complete the back row of the scrum with Charvis, with the captain moving from No.8 to openside flanker to accommodate Popham. Behind the scrum, Steve Hansen would change all but one of his backs. Scrum-half Gareth Cooper and fly-half Stephen Jones would partner up in the half-backs, Mark Taylor would partner Sonny Parker (the only back to keep his place) in the centres, and Tom Shanklin and Shane Williams would play on the wings on either side of fullback Garan Evans. On the sideline, Dafydd Jones, Dwayne Peel, Ceri Sweeney and Gareth Thomas would all drop to the substitutes’ bench following the Italy game, with prop Gethin Jenkins and lock Chris Wyatt coming into the matchday squad in place of Duncan Jones and Gareth Llewellyn respectively. To pre-match observers, it looked like Hansen had sent out his ‘B’ team, seemingly accepting defeat to the All Blacks before the match started.
Starting line-ups
| New Zealand | No. | Position | Position | No. | Wales |
|---|---|---|---|---|---|
| Mils Muliaina | 15 | Fullback | Fullback | 15 | Garan Evans |
| Doug Howlett | 14 | Right wing | Right wing | 14 | Shane Williams |
| Leon MacDonald | 13 | Outside centre | Outside centre | 13 | Mark Taylor |
| Aaron Mauger | 12 | Inside centre | Inside centre | 12 | Sonny Parker |
| Joe Rokocoko | 11 | Left wing | Left wing | 11 | Tom Shanklin |
| Carlos Spencer | 10 | Fly-half | Fly-half | 10 | Stephen Jones |
| Justin Marshall | 9 | Scrum-half | Scrum-half | 9 | Gareth Cooper |
| Dave Hewett | 1 | Loose-head prop | Loose-head prop | 1 | Iestyn Thomas |
| Keven Mealamu | 2 | Hooker | Hooker | 2 | Robin McBryde |
| Greg Somerville | 3 | Tight-head prop | Tight-head prop | 3 | Adam Jones |
| Brad Thorn | 4 | Lock | Lock | 4 | Brent Cockbain |
| Ali Williams | 5 | Lock | Lock | 5 | Robert Sidoli |
| Reuben Thorne (capt.) | 6 | Blindside flanker | Blindside flanker | 6 | Jonathan Thomas |
| Richie McCaw | 7 | Openside flanker | Openside flanker | 7 | Colin Charvis (capt.) |
| Jerry Collins | 8 | Number 8 | Number 8 | 8 | Alix Popham |
| Substitutes | Substitutes | ||||
| Mark Hammett | 16 | Hooker | Hooker | 16 | Mefin Davies |
| Kees Meeuws | 17 | Prop | Prop | 17 | Gethin Jenkins |
| Rodney So’oialo | 18 | Number 8 | Lock | 18 | Chris Wyatt |
| Marty Holah | 19 | Flanker | Flanker | 19 | Dafydd Jones |
| Byron Kelleher | 20 | Scrum-half | Scrum-half | 20 | Dwayne Peel |
| Dan Carter | 21 | Fly-half | Fly-half | 21 | Ceri Sweeney |
| Ma’a Nonu | 22 | Centre | Utility back | 22 | Gareth Thomas |
| John Mitchell | Coach | Coach | Steve Hansen |
First Half
A near sell-out of 80,012 spectators would pack Sydney’s Telstra Stadium (now Stadium Australia) for the final match of the pool stages. After the national anthems and the haka had been performed, New Zealand would start quicker than a greyhound with a rocket strapped to its back. Less than two minutes would pass before the All Blacks had crossed the Welsh whitewash. After New Zealand failed to catch the opening kickoff, the ball fell into the hands of scrum-half Justin Marshall, who would immediately launch an attack from inside the All Blacks’ 22. Spreading the ball wide to Joe Rokocoko, the winger’s speed would take New Zealand over the halfway line before being tackled. A loose ball in the next phase would see Wales push New Zealand back into their own half. Still, Marshall and halfback partner Carlos Spencer would clean up by spreading possession to the other wing, where fullback Mils Muliaina and wing Doug Howlett would combine effectively. The All Blacks were trying to keep the ball alive, and lock Ali Williams would rampage into the 22 before his offload was accidentally knocked forward by a Welsh player to end the attacking phase and give the All Blacks the first scrum of the match.
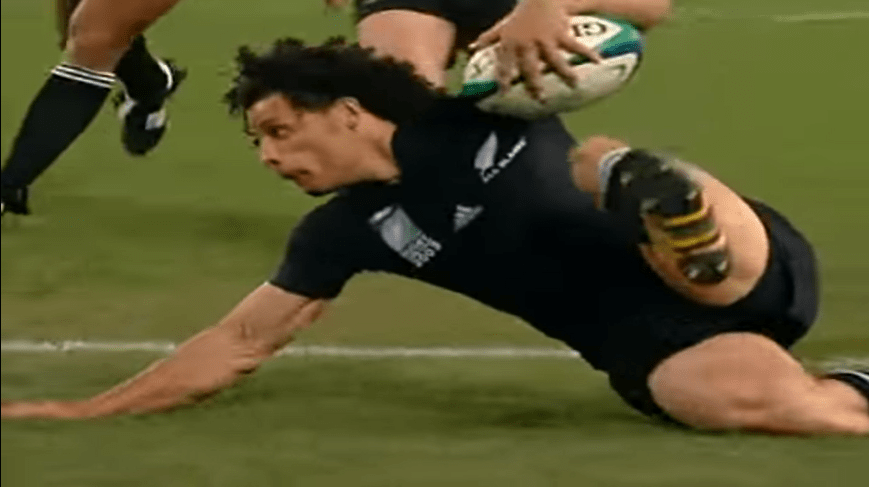
New Zealand would get quick ball off the scrum with Justin Marshall flinging the oval out to Carlos Spencer. Spencer would engage the Welsh defence while drifting to the left before giving an inside pass to centre Aaron Mauger behind him. Mauger would break one tackle before Colin Charvis brought him to the ground. A carry from lock Brad Thorn would also force Wales back, and the All Backs would flood the resulting ruck to secure quick ball for Marshall. Marshall would again find Spencer at first receiver. The fly-half would take out two Welsh defenders with a miss-pass to centre Leon MacDonald, who would take out Welsh wing Tom Shanklin by quickly popping the ball to Joe Rokocoko on the wing. Rokocoko would take the ball on the run and use his sprinter speed to cross the try-line quicker than any Welsh defender could tackle him. New Zealand had scored the game’s first try with 92 seconds on the clock, and Rokocoko had his 3rd try of the World Cup. Faced with a tricky touchline conversion outside the 22, outside-centre Leon MacDonald hit a brilliant kick to convert Rokocoko’s score and give New Zealand a 7-0 lead inside 3 minutes. What a start.
Wales’s desire to break back immediately was shown from the restart when 5ft 7 winger Shane Williams tackled 17-stone hooker Keven Mealamu. However, New Zealand would again show their desire to score points quickly by running the ball from their own 22. Carlos Spencer would find Leon MacDonald on his right, and the centre would find acres of space in front of him, almost reaching halfway before offloading out of the tackle to Doug Howlett, who would carry the ball up to the Welsh 10-metre line before kicking the ball into the Welsh backfield. The bouncing ball would beat Tom Shanklin and the advancing Spencer before being caught by Wales scrum-half Gareth Cooper. Cooper would have no room to move as he was immediately wrapped up by his opposite number Justin Marshall. With no scrum half at the ruck, captain Colin Charvis would pick up from the base and kick the ball downfield to alleviate the attacking pressure, albeit momentarily.
From the kick, All Blacks centres Macdonald and Aaron Mauger would feed fullback Mils Muliaina. Muliaina would make 15 metres before fining Rokocoko on his inside. The Fijian-born winger would again cause havoc in the Welsh defence, feinting and dummying off both feet before offloading to openside flanker Richie McCaw from a double tackle inside the Wales 22. Unfortunately, McCaw would drop the ball forwards, and Wales would gain possession of the rugby ball. Fly-half Stephen Jones would clear the ball with a kick into the New Zealand half. This long phase of play would end with Doug Howlett kicking the ball into touch on the full, giving Wales a line-out five metres inside their own half. All this inside the first five minutes.
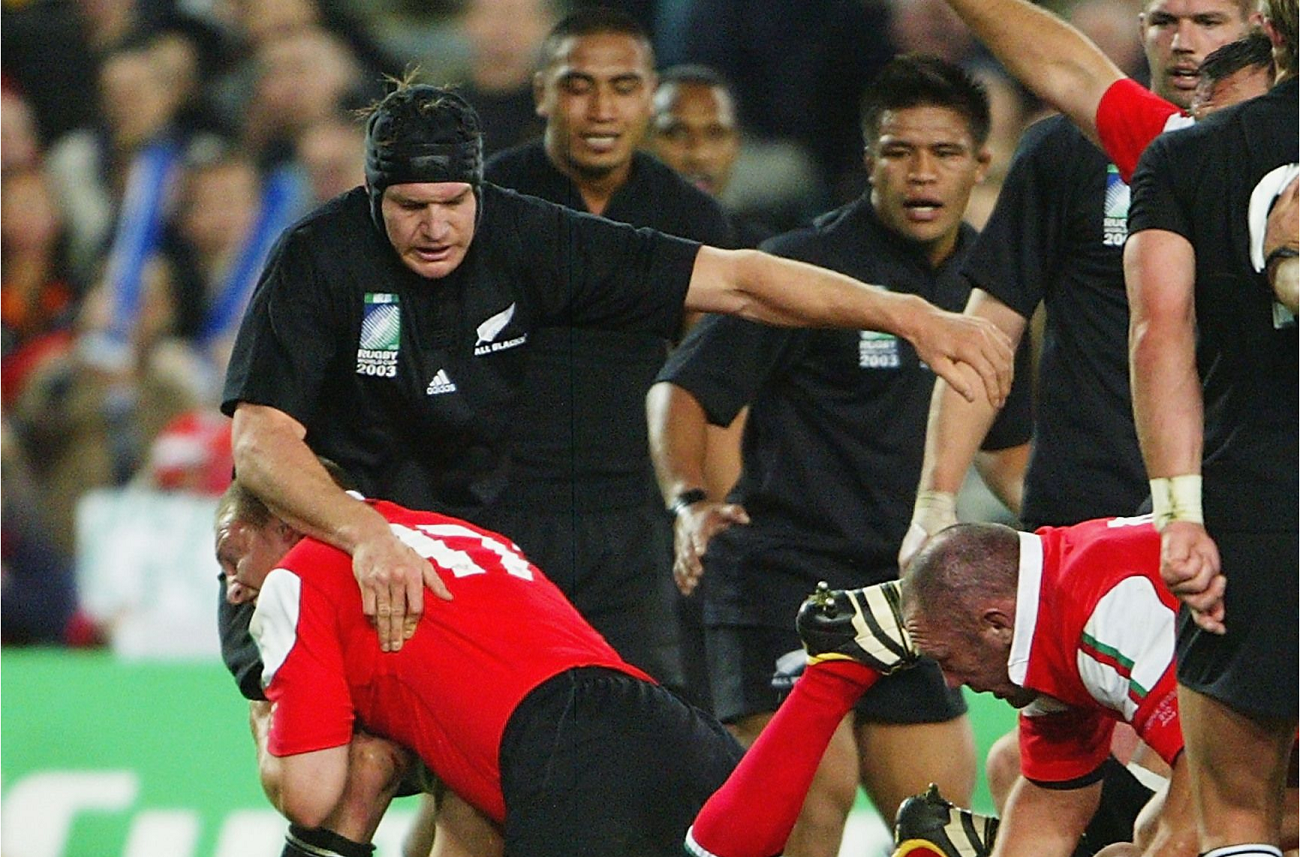
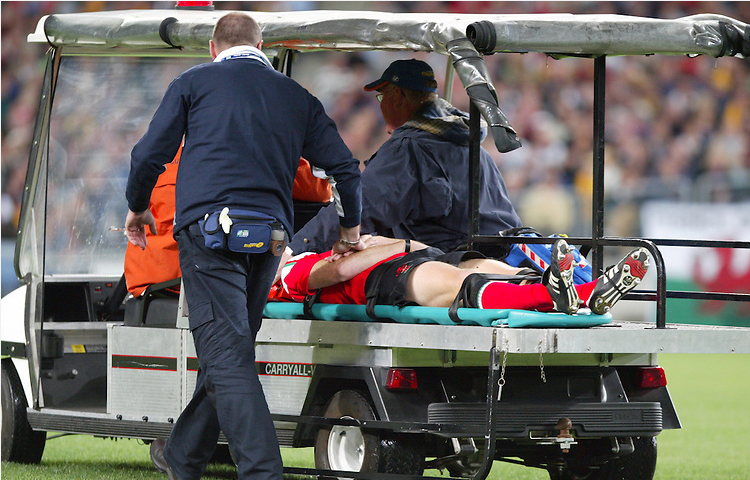
Wales would have to delay taking the line-out as Garan Evans received treatment from physios. The fullback had jarred his neck after colliding with teammate Colin Charvis while attempting to tackle Joe Rokocoko. Evans’ situation did not look great, and Steve Hansen would have utility back and regular starter Gareth Thomas come off the subs bench and take his place at fullback. After a few minutes of treatment, Garan Evans was fitted to a stretcher and taken off on a motorised buggy, leaving the match five minutes into his Rugby World Cup debut. The 30-year-old Llanelli Scarlets fullback had only returned to the Welsh squad during the Six Nations, his appearances against Ireland and Scotland coming five years after his debut in Wales’s record 96-13 defeat to South Africa in 1998. However, this neck injury sustained on his 4th international cap would end Garan Evans’ international career with this match.
After that injury delay, the game would restart with a Wales line-out with 4 minutes 50 seconds on the clock. The Welsh line-out would go loose, with tight-head prop Adam Jones pouncing on the loose ball to retain possession. However, Gareth Cooper would immediately box-kick the ball back to New Zealand, where the ball would end up in the hands of Doug Howlett.
In the 7th minute, Wales would begin a multi-phase run of possession that would almost result in a try of their own. The team in red would force a turnover on a carry by All Blacks captain Reuben Thorne, and Wales would have their first significant period of ball possession. In the second phase, Stephen Jones would play a short pass to lock Robert Sidoli, and the tall man would run through a gap filled by referee Andre Watson to break the defensive line and gallop into the New Zealand 22 before being tackled by Mils Muliaina. After a five-second ruck, Jones would miss several attackers by sending a long pass to blindside flanker Jonathan Thomas who would make ground and secure quicker ball. Wales would crash the ball up during the subsequent two phases, but New Zealand’s defence would hold firm. However, outside centre Mark Taylor would occupy four All Blacks before being tackled, and Gareth Cooper would reverse the direction of play to expose the stretched defence. Stephen Jones would play a switch with lock Brent Cockbain before sending Colin Charvis through a small gap and three All Blacks players. Gareth Thomas would play scrum-half for Adam Jones to take Wales within five metres of the New Zealand try-line. Gareth Cooper would go himself to earn a couple more metres. Wales would then lose ground due to New Zealand’s defensive line speed. However, No.8 Alix Popham would bring Wales back to within five, and his pass to Jonathan Thomas would take the team within three.
Two phases later, Stephen Jones would send a pass to Gareth Thomas. The fullback would duck inside two New Zealand defenders before Richie McCaw caught his legs. Thomas reached out to touch the ball down over the try-line, only to drop the ball forward over the line. Justin Marshall would clear New Zealand’s lines from the resulting scrum with a brilliant kick that went out near the halfway line.
From that 15-phase attack, Wales had shown they were ready to go toe-to-toe with New Zealand. With less than 10 minutes played, this was already making for an exciting match.
Wales would enjoy more possession after this first serious attacking move. However, they would be met with a ferocious New Zealand defence. To break through this line, Stephen Jones would chip through into clear air before finding Tom Shanklin to return Wales to the All Blacks 22. The next phase would see Gareth Thomas nailed with a big hit from Mils Muliaina, but the fullback would free his hands to offload to Jonathan Thomas from the ground. Thomas would quickly throw the ball behind him and escape another huge tackle, finding Mark Taylor in space. The outside centre and his partner Sonny Parker would catch Doug Howlett in no man’s land, and Taylor would run through to touch the ball down for Wales’s first try of the night. Stephen Jones would convert from the kicking tee, and the match was tied 7-7 after 13 minutes.
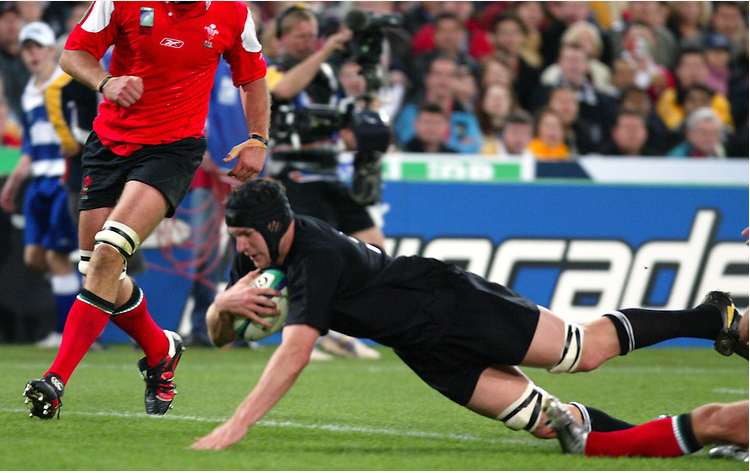
However, just as Wales had levelled this match, the All Blacks would strike again. Starting 15 metres inside their own half, Mils Mulianina would take the ball over the 10-metre line before Wales slowed down the ball from the ruck. However, Carlos Spencer would cut out two All Blacks attackers to feed his No.8 Jerry Collins. Collins would make contact and pop the ball off to Keven Mealamu. These two passes had removed six Welsh defenders, leaving the defence short of numbers on the outside. Mealamu and lock Brad Thorn would make the halfway line before shipping the ball to Joe Rokocoko. Rokocoko would survey the play in front of him, beat Colin Charvis’s tackle, cut infield and break through fullback Gareth Thomas’s tackle and reach the 22 before dummying passing the ball to Justin Marshall and diving low over the try-line to finish a superb second try for himself and the All Blacks. Leon MacDonald would land the conversion to re-establish New Zealand’s seven-point lead at 14-7 after 15 minutes. Wales had been level for 1 minute.
This match had started rapidly and was not slowing down. After receiving a clearing kick, Shane Williams from his wing would pass in-field to Gareth Thomas. Thomas would ride one tackle before offloading to Jonathan Thomas. The blindside flanker would pin back his ears to out-pace a prop and a winger and avoid the tackles of both Doug Howlett and Carlos Spencer to cross into the 22. The 21-year-old flanker’s charge would finally be halted by Justin Marshall 7 metres short of the try-line before he offloaded to Robert Sidoli to continue the attack. A couple of phases later, Wales was rewarded with the game’s first penalty. Stephen Jones opted for the kick at goal and would split the posts with his effort to bring the score to 14-10 after 18 minutes.
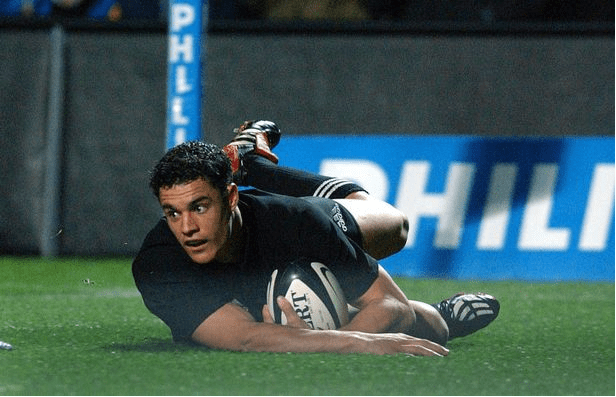
Two minutes later, New Zealand would launch an attack from a line-out on the halfway line. Justin Marshall would reach the defensive line before sending Richie McCaw up to the 10-metre line. McCaw would offload to Jerry Collins, who would require two tacklers to bring him down just short of the 22. Welsh handling in the ruck would eventually earn New Zealand a penalty one phase later. Marshall would take the quick tap penalty to take advantage of the disorganised Welsh defence, and Leon MacDonald would stream through to score New Zealand’s third try of the night. MacDonald’s try would end an engrossing opening 20 minutes, which had produced four tries and 29 points. The centre would convert his touchdown to extend New Zealand’s lead to 21-10 after 21 minutes. Halfway through the first half, the All Blacks were only one try away from earning a bonus point.
In the 23rd minute, a Welsh line-out on halfway would go awry, and All Blacks lock Ali Williams would snatch the ball on the ground and make 15 metres. Marshall and Spencer would spread the ball wide to Mils Muliaina, who, through his leg drive and the help of some teammates, would get the All Blacks within 20 metres of the Welsh posts. However, a ball would go loose, and Gareth Thomas would send a clearing kick just short of the New Zealand 22. The game was starting to become very open, moving from a Stephen Jones chip and chase in the New Zealand half quickly turning into Justin Marshall’s kick downfield almost leading to Doug Howlett scoring, only for Mark Taylor to gather the ball and Wales to clear again. The All Blacks were looking menacing with the ball in hand. Wales were not being over-awed by their opponents, but you did fear for them at this point.
A bleeding lip for Mark Taylor would force Wales into their second substitution of the first half, with replacement fly-half Ceri Sweeney taking his centre spot temporarily. A few minutes later, New Zealand would score their 4th try of the first half. The All Blacks would force Wales into collapsing their own maul with their counter-drive, and their counter-rucking would result in a turnover. On the next phase, Jerry Collins would take the All Blacks six metres short of the line. A dropped pass would see the All Blacks lose ground with Joe Rokocoko wrapped by the Welsh tacklers. However, Carlos Spencer would then send a crossfield kick to the opposite wing, and lock Ali Williams would hare forward to contest the ball against Robert Sidoli and Shane Williams. On the charge and with a significant height and weight advantage over his Welsh namesake, Ali Williams would catch the kick and fall over the try-line for his first New Zealand try. The 22-year-old had also secured the All Blacks’ try bonus point inside half an hour. Leon MacDonald would maintain his perfect conversion record, and New Zealand now led 28-10 with 10 minutes to go until half-time. By this point, it seemed like there would only be one winner in this match, and some were already predicting the All Blacks’ margin of victory.
Despite having the bonus point, New Zealand would push for more tries and get out of their half within two phases of receiving the restart. However, Wales would recover enough to shove Justin Marshall into touch around the halfway line. Soon, both teams would be forced to make changes. Mark Taylor would come back on for Ceri Sweeney at outside centre with his lip stitched up, while Jerry Collins required some for his nose, leading to Rodney So’oialo coming on at No.8 for the time being. However, Wales, whether tactical or enforced, would change one of their front row, with Adam Jones being replaced by Gethin Jenkins. After a tactical kicking battle, Shane Williams would sidestep Brad Thorn and break the line, sprinting towards the 22. In the 22, Williams dodged the tackle of Muliaina and spread the ball to the supporting Tom Shanklin. Shanklin would make further ground before offloading to Sonny Parker to slide in for Wales’s second try. The New Zealand-born centre, who had only qualified to play for Wales through residency in 2002, had now scored against the country of his birth for his third try in as many games at this World Cup. Stephen Jones would follow up with a successful conversion, and Wales were back within touching distance at 28-17 with five minutes to go until half-time. However, Wales was not done yet in this first half.
That try would be the final act of Sonny Parker’s day. As well as scoring the try, the centre had actually injured himself while doing so. Ceri Sweeney would come on for the second time in one half for Wales’s third enforced change of the game. In the penultimate minute of the half, Wales would turnover New Zealand inside their own half. Starting from their own 10-metre line, the ball would be spread out to Shane Williams. Williams would run towards the touchline and feign passing the ball before subtly curving inside two All Blacks forwards. Crossing the All Blacks 10-metre line, Williams would pass inside to Ceri Sweeney, who quickly popped the ball inside to Robert Sidoli, who would finally go to ground 15 metres from the try-line. After a couple of scruffy phases, Wales would be saved by referee Andre Watson penalising New Zealand for a Jerry Collins high tackle. Wales would have one more chance to score points before the half was up.
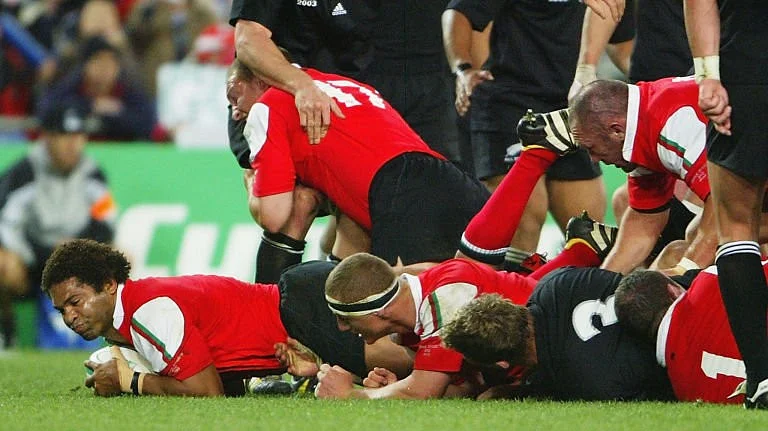
Wales would choose to kick for the corner and a possible seven points. Jonathan Thomas would catch the line-out five metres out and hold it out for prop Iestyn Thomas to take. Thomas would roll a defender before handing the ball for Alix Popham to burrow further. With New Zealand forced back behind their own try-line, Colin Charvis would pick up the loose ball, reach over the ruck and score. Wales had ended the first half strongly with two tries in five minutes. Stephen Jones’s conversion would bring Steve Hansen’s team back within four points at the break, and New Zealand would lead Wales 28-24 after a pulsating first 40 minutes.
Half-time: New Zealand 28 Wales 24
Seven tries. A combined 52 points were scored. An ebb and flow of momentum through the half. Some exhilarating attacking rugby. This first half had it all. It would be amazing to see if the second half lived up to this.
Second Half
Following the restart, New Zealand would start the second half sloppily. Giving away a free kick on their own attacking line-out, followed by a collapsed scrum, would lead to Wales earning a penalty three minutes into the second half. Stephen Jones would test his kicking range from a central position 47 metres out and would be successful, taking Wales within a point of New Zealand’s lead at 28-27. Then, a terrific box kick from Gareth Cooper following the restart would quickly get Wales up to their 10-metre line. Brent Cockbain would get in front of Ali Williams to steal the New Zealand line-out, and Ceri Sweeney would make a line-break on the resulting attacking phase, playing a one-two with Colin Charvis before Joe Rokocoko and Doug Howlett finally halted his stride five metres short of the try-line. From the base of the ruck, Gareth Cooper would fling the ball out to Gareth Thomas, with Wales now overlapping on the left side. Thomas would throw another long pass to find Shane Williams. Mils Muliaina would attempt an intercept, but the ball would reach the tricky winger, and Shane Williams would jog over and touch the ball down for Wales’s bonus-point try. Stephen Jones would continue his perfect kicking record from the tee, and Wales now led New Zealand 34-28 six minutes into the second half. Not only had Wales scored 10 points in three minutes, and since half-time, Wales had scored 24 unanswered points in the last 15 minutes of game-time, going from a 28-10 deficit to lead the All Blacks by six points.
Fans and journalists could scarcely believe their eyes. Wales, a team that had gone winless during the Six Nations, was now leading one of the World Cup favourites and threatening to get a first win over New Zealand since 1953.
Knowing they were in a fight, New Zealand would pressure Wales, forcing the try-scorer Williams to slice a clearing kick into touch inside Wales’s 22. Jerry Collins would paw the attacking line-out back to Justin Marshall, who would feed Richie McCaw to make contact. Two phases later, Aaron Mauger would run against the grain of the Welsh defence to centralise New Zealand’s attacking platform. After the ball spurted out of the ruck, Carlos Spencer would keep the move alive and move to the right, forcing Alix Popham to burst out of the defensive line and leave a gap for Doug Howlett to run into. Howlett would receive Spencer’s pass and make ground, feeding fullback Mils Muliaina to get the All Blacks within four metres of the line. Popham would knock the ball out of Justin Marshall’s hands from the ruck, giving New Zealand a penalty.
Carlos Spencer would kick to the corner, and Ali Williams would receive the line-out, which turned into a quickly collapsed maul. Tight-head prop Greg Somerville and Williams would tie in a couple more Welsh defenders with quick carries. Justin Marshall would soon move the ball wide to the left. Carlos Spencer would play a wrap-around with Aaron Mauger, with Leon MacDonald as a decoy runner. Spencer would accept the return ball from Mauger and eventually find Doug Howlett, who would speed through two tacklers to score New Zealand’s 5th try and the All Blacks’ first points in 19 minutes. Leon MacDonald would have the chance to put the All Blacks a point in front but would curl his conversion attempt to the left, leaving Wales slightly ahead at 34-33. However, the All Blacks were not giving up this game.
After a kicking battle ending with Ceri Sweeney hitting a beautiful 50+ metre kick into the New Zealand 22 (a 50-22 today), New Zealand would start replenishing their forces. Kees Meeuws would replace Dave Hewett in a tactical change at prop and, through injury, Marty Holah would replace Jerry Collins at No.8. Two phases after that defensive All Blacks line-out, Wales would earn a kickable penalty from New Zealand entering the ruck from the side. Stephen Jones would score the straightforward three to push Wales’s lead out to four points (37-33) after 53 minutes.
Carlos Spencer would aim his restart towards Tom Shanklin. The winger would fail to catch the kick, knocking the ball forward ten metres from his own try-line. Openside flanker Richie McCaw would snaffle up the loose ball to give New Zealand an attacking platform. The All Blacks forwards would then form a maul around replacement prop Kees Meeuws to trundle the ball to the five-metre line. After two further carries from the forwards, the ball was spread wide, and an Aaron Mauger miss-pass would take out four Welsh defenders to reach centre partner Leon MacDonald. MacDonald would pass behind to Carlos Spencer, but Spencer’s final ball to Doug Howlett on the wing would be knocked forward, and the chance would go begging. That was a warning shot. Another warning shot would come two minutes later when Mils Muliaina was held over the line by the combined efforts of Shane Williams and Gareth Thomas. Kees Meeuws would also be held up over the line. New Zealand continually threatened to take the lead, but Wales kept holding them off for now. During this period, Wales would bring on lock Chris Wyatt for what would turn out to be his 38th and final Wales cap as a replacement for Brent Cockbain.
With 20 minutes to go, Wales still led New Zealand 37-33. If Wales could hang on, this would mark among the most remarkable victories in rugby history. However, they would need to keep out the All Blacks for 20 minutes. The levee would finally break after several attacking scrums. Richie McCaw would pick up from the base. Justin Marshall would run a dummy line to his right, with McCaw swerving to pass to Carlos Spencer on his left. Spencer would drift and dummy passing to his outside before running through himself to score New Zealand’s 6th try and put New Zealand back in the lead. Leon MacDonald’s conversion would hit the post, but New Zealand now had a one-point lead at 38-37, marking the 4th lead change of the match. However, a Welsh score could quickly change things once more.
Carlos Spencer’s try would galvanise New Zealand, while Wales was starting to look nervous. Gareth Cooper would knock the ball forward from the back of a ruck and quickly grubber it away, only for Mils Muliaina to run it back 15 metres. During this time, Wales would make two forward changes: Mefin Davies replaced Robin McBryde as hooker, and Dafydd Jones came on for Alix Popham in the back row. In the 65th minute, Jonathan Thomas would launch another blistering line break. The blindside flanker would take a flat pass from Stephen Jones before bursting between Greg Somerville and Richie McCaw, eventually being tackled a metre short of the 22. Wales would subsequently earn the put-in at the scrum, but Mark Taylor would drop the ball from the next attacking phase while fending off a defender and the chance was gone. Two minutes later, New Zealand won a penalty on halfway for a high tackle.
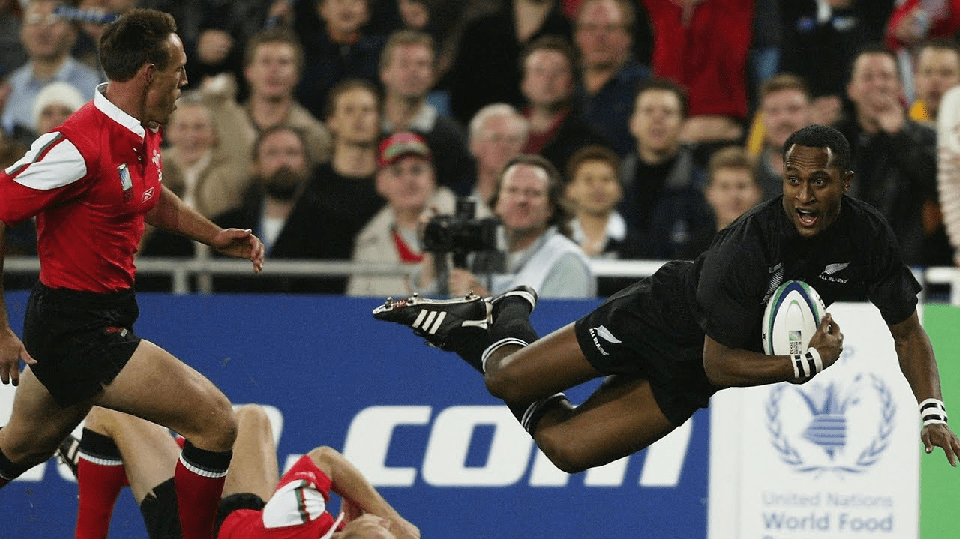
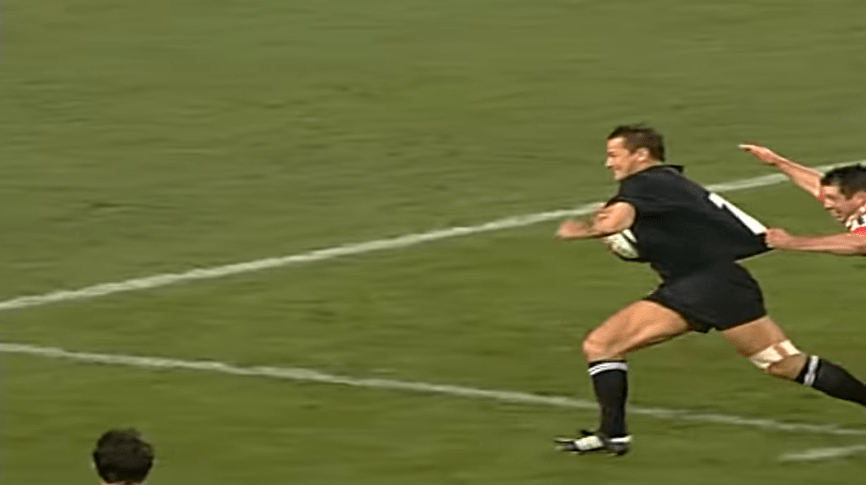
Another series of attacking scrums on Wales’s 5-metre line would end in another New Zealand try. Richie McCaw would again pick up from the base and pass to Justin Marshall, making a run to his right. Marshall would engage Jonathan Thomas before using his pace to burn around the outside and occupy both the flanker and outside defender Shane Williams. The scrum-half would successfully get both hands free in the tackle to throw the ball to Doug Howlett for the winger to walk in his second try. Even though the final pass from Marshall to Howlett may have looked forward, the try was awarded. Leon MacDonald would miss his third conversion to take New Zealand’s lead beyond a converted try, but New Zealand still led Wales 43-37 with nine minutes to go.
However, despite conceding three tries in eleven minutes, Wales was still showing they were up for the fight. One converted try, and they would lead again. However, New Zealand was starting to assert themselves in the closing stages of this match, with Justin Marshall running the game from scrum half. New Zealand’s range of tactical kicking was also pinning Wales inside their own half, forcing turnovers and penalties. In the 74th minute, New Zealand took the kickable penalty in front of the posts, and Leon MacDonald would get his first successful kick in four to take New Zealand’s lead beyond a converted score at 46-37.
Barring a late Wales comeback, the game seemed to be heading New Zealand’s way. From the restart, one single attacking phase would take New Zealand from their 10-metre line to inside Wales’s 22. Justin Marshall would link up with Richie McCaw and Aaron Mauger to make the Welsh 10-metre line before offloading to Marty Holah. Richie McCaw would carry the ball deep into the 22 before finding Joe Rokocoko, who had been quiet since his early scores. A double tackle on Rokocoko would end New Zealand’s attacking phase 10 metres from the try-line. Carries from MacDonald, Marshall and Marty Holah would drag New Zealand closer before captain Reuben Thorne played scrum-half. Thorne would pass to Carlos Spencer on his right, and Spencer would send Aaron Mauger through a gap to score New Zealand’s 8th try. Five of New Zealand’s seven backs had now crossed the whitewash, with Justin Marshall and Mils Muliaina the odd ones out. Leon MacDonald would slot the conversion through the posts to extend New Zealand’s lead to 16 points at 53-37 with four minutes remaining. Twenty points without reply in fourteen minutes had won New Zealand this match after Wales had threatened to cause an upset. New Zealand could now look ahead to a quarter-final clash with Pool C runners-up South Africa. Wales would now face the winners of that group and World Cup favourites, England.

Despite the result now being in no doubt, New Zealand was not done, breaking straight from a restart. Lock Brad Thorn would take the team to the Welsh 22 again. However, Wales hooker Mefin Davies would force Richie McCaw to knock the ball forward to quickly end that attack. Wales would clear the ball to the halfway line, and Gethin Jenkins would steal the New Zealand line-out at the back. This would result in a Wales penalty. Replacement scrum-half Dwayne Peel would take the quick tap penalty, showing that Wales wanted one more try. However, a knock-on would quickly bring this attack to an end. New Zealand would earn a penalty from the scrum and go again, with Marty Holah being brought down on the Wales 10-metre line. Justin Marshall would pick up and go himself to fall just short of the 22, and prop Kees Meeuws would fend off a tackle to fall seven metres short. Marshall would reverse the direction of play to Carlos Spencer, and Aaron Mauger would send a grubber kick through that Mils Muliaina would touch down in the in-goal area. However, this supposed try was called back for Muliaina being offside when the kick was made.
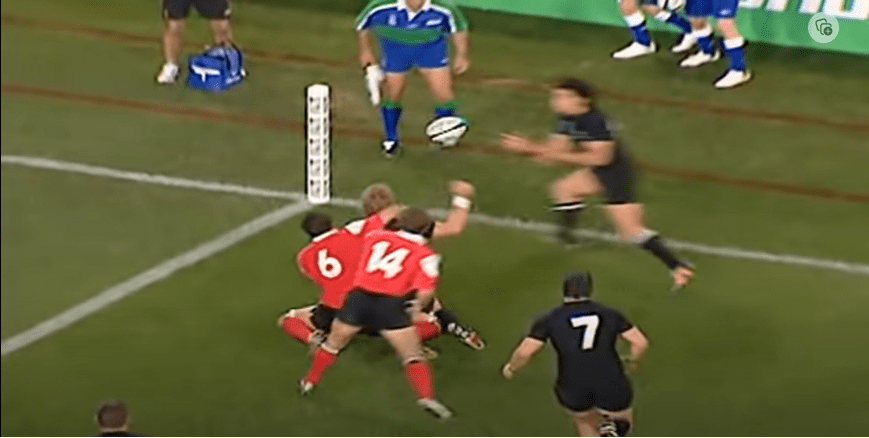
Wales would kick the ball into touch and have a line-out with the clock in overtime. From the line-out, Stephen Jones would pass inside to Gethin Jenkins, and the prop would play a no-look pass behind him to set Tom Shanklin away. Shanklin would reach the 22 before passing to Dwayne Peel, who would make further ground. However, All Blacks players would quickly get their hands on the ball, earning the penalty advantage. Carlos Spencer would break the line and make 12 metres from the ruck before passing to Richie McCaw to cross halfway. McCaw would send a grubber kick through for support players to chase. Shane Williams would collect the ball and run into touch to end this absorbing and exhausting encounter. New Zealand had won, beating Wales 53-37 to top Pool D. However, the All Blacks players couldn’t celebrate, as they were using that energy to get their breath back after a great match.
In what was expected to be an easy win for New Zealand against a supposed Welsh ‘B’ team seemingly accepting defeat before kick-off by making ten personnel changes, this unheralded and unrated Wales side had shown their colours, taking the game to New Zealand. Losing 28-10 after 30 minutes, Wales had taken control of the match in the middle section, scoring 24 points in 15 minutes to take an unlikely lead. They maintained this lead at 37-33 until the final 20 minutes when New Zealand’s superior ability shone through, and 20 points (including three tries) saw the All Blacks safely home at 53-37. Both teams would end this game with bonus points, with Wales scoring 4 tries to New Zealand’s 8. Joe Rokocoko and Doug Howlett would finish with braces on one side, while fly-half Stephen Jones contributed 17 points from the boot on the other side. Both teams would combine for 12 tries and 90 points across the 80 minutes, with one try coming every 6 minutes on average.
FT: New Zealand 53 Wales 37
The bonus-point win for New Zealand would see the All Blacks top Pool D with a 100% winning record and a maximum of 20 points from 20. John Mitchell’s team had conceded just 57 points in their four pool matches, but 37 of those had come from Wales, showing how much of a challenge they had posed. Wales, despite the loss, would easily finish second in Pool D with 14 points after 3 wins and 1 defeat. It was evident that Steve Hansen’s side had left their best performance until last, with the four tries they scored against New Zealand giving them just their second bonus point of the World Cup. However, 57 of the 98 points that Wales had conceded during Pool D had come from New Zealand, showing the the effectiveness of the All Blacks against that Welsh defence. As Pool D winners, New Zealand would face Pool C runners-up South Africa in the quarter-finals, while Wales would face that group’s winners, England, a day later.
Final Pool D Table
| Team | Played | Wins | Draws | Losses | Points For | Points Against | Points Difference | Bonus Points | |
|---|---|---|---|---|---|---|---|---|---|
| New Zealand | 4 | 4 | 0 | 0 | 282 | 57 | +225 | 4 | 20 |
| Wales | 4 | 3 | 0 | 1 | 132 | 98 | +34 | 2 | 14 |
| Italy | 4 | 2 | 0 | 2 | 77 | 123 | -46 | 0 | 8 |
| Canada | 4 | 1 | 0 | 3 | 54 | 135 | -81 | 1 | 5 |
| Tonga | 4 | 0 | 0 | 4 | 46 | 178 | -132 | 1 | 1 |
Aftermath
New Zealand and Wales would top and tail the 2003 Rugby World Cup quarter-finals with their matches against the top two teams from Pool C. On 8th November, New Zealand would continue their dominant run with a 29-9 win over Pool C runners-up South Africa. The All Blacks had never looked like losing the match, but poor accuracy plus penalties from Springboks fly-half Derick Hougaard kept the score a tight 13-6 at half-time. After the break, however, New Zealand would show class in attack and steel in defence. Second-half tries from Keven Mealamu and Joe Rokocoko, to add to Leon MacDonald’s effort from the first 40, saw New Zealand push past their Southern Hemisphere rivals without reaching top gear.


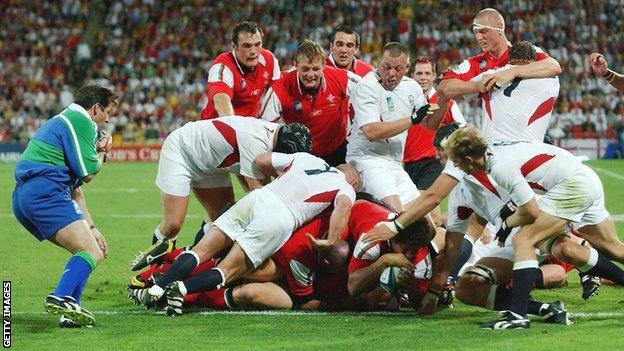
The following day, Wales would face old rivals England in the last quarter-final. The two previous times the teams had met in 2003, Wales had failed to register double figures in points as England won 26-9 in the Six Nations and 43-9 in a World Cup warm-up match. For this game in Brisbane, Wales’s coach Steve Hansen would retain 11 of the 15 that started against New Zealand. This starting XV included seven of the ten players brought in for that game. Iestyn Thomas (tight-head prop), Robert Sidoli (second row), Jonathan Thomas (No.8), Gareth Cooper (scrum-half), Stephen Jones (fly-half), Mark Taylor (outside-centre) and Shane Williams (wing) had all impressed enough against the All Blacks to picked alongside the returning starters Dafydd Jones (blindside flanker), Iestyn Harris (inside-centre), Mark Jones (wing) and Gareth Thomas (fullback) for this game against the World Cup favourites.
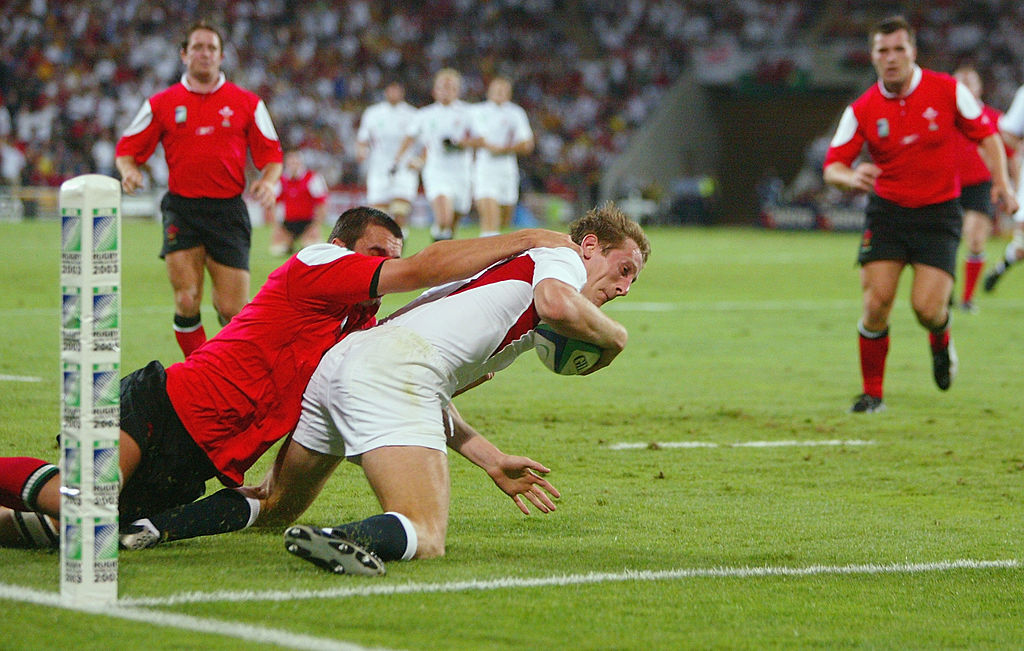
At half-time in the Suncorp Stadium, the rugby world was stunned. The first 40 minutes had not gone according to Clive Woodward’s plan. The unfancied Wales team had stood up to their more heralded rivals in attack and defence. Keeping England to one Jonny Wilkinson penalty, Wales had struck close to half-time, scoring tries through Stephen Jones and Colin Charvis to take a 10-3 half-time lead. However, with some England fans fearing a potential upset, the Six Nations champions would wipe the slate clean at the start of the second half, even wearing brand-new kits. Within four minutes, England was level through a Will Greenwood try that Jonny Wilkinson converted, and from that point, England never really looked back. Five Wilkinson penalties would take England’s lead out to 25-10. A Martyn Williams score with nine minutes to go would throw the cat amongst the pigeons, and Welsh kicker Iestyn Harris would have the chance to set up an exciting finale with a penalty. However, the rugby league convert would miss horribly, and Wilkinson would have the last say with a trademark drop goal. England would get the predictable victory with a 28-17 score, but Wales would head home with pride, having outscored their rivals three tries to one and putting out an excellent performance in defeat.
The year following this World Cup, New Zealand would travel to Cardiff for the November autumn internationals. On 20th November 2004, a Wales side coached by Mike Ruddock would come agonisingly close to ending their losing run against New Zealand. Wales would lead 14-13 at half-time thanks to a Tom Shanklin try and three Stephen Jones penalties. A Mefin Davies try plus two Gavin Henson penalties would add to their lead, but scores from Mils Muliaina and Joe Rokocoko, plus points from Dan Carter’s boot, would give New Zealand a one-point advantage heading into the closing stages. Not knowing how much time was left, Wales captain Gareth Thomas would choose to kick for the posts rather than for the corner. Henson subsequently missed the penalty, and New Zealand, coached by former Wales boss Graham Henry, would eke out a narrow 26-25 victory. Wales would win their first Six Nations Grand Slam the following spring since 1978.
That 2004 match is the closest Wales have come to beating New Zealand recently, with first-hand memories of that last Welsh win in 1953 becoming fainter by the year. However, for 15 minutes in Sydney in 2003, a young and unfancied Wales team could dream of ending that run. In that World Cup Pool D decider, Wales was excellent. New Zealand was better. But what a test match these two teams had combined to create.
If you want to watch the New Zealand-Wales 2003 World Cup match in full, follow this link: https://www.youtube.com/watch?v=BU5Yk9ug5W8&list=WL&index=8 Enjoy!
